html 코딩의 기본 개념만 정리 하였습니다.
html 코딩은 웹페이지에 기본적으로 골격을 나타낸 것입니다.
이건은 간단한 사항이라 별도의 텍스트 없이 내용만 간단히 처리 하겠습니다.
- 헤드라인과 문단 소스
<h1>humanmans have reache Mars</h1>
<h3>he Sarship rocket successfully landed on th red plant this moning.</h3>
<p>
After a 115 days lon journy, th crew of finally arrived to their desination.
This is the first time humans have set foot on a planet other than Earth</p>
결과
<h1>humanmans have reache Mars</h1><h3>he Sarship rocket successfully landed on th red plant this moning.</h3><imgsrc="https://scx2.b-cdn.net/gfx/news/2021/a-couple-of-trainee-as-1.jpg"width="100%"/><p>After a 115 days lon journy, th crew of finally arrived to their desination.This is the first time humans have set foot on a planet other than Earth</p><img src="https://blogger.googleusercontent.com/img/a/AVvXsEiTX7ZMBy8hgCUYGBCqiBX5CWHQhctWh9ow_zAJDqIaUNlLML08nUQoYGqAY0AQqls_U2v7_tID8oO2vUCzErms-ktMFE9KbNJRki-5oaSmorCzPaT3vo5SBF_9oBj4eHKmvcM6uGBxAAIf_0DZDwNOnbxdB0ZqJJ8qsmUF_J82errZNWdJrelQke8Wx9D8"width="100%"/>"
<h1>Welcome!</h1><p>You have been granted acess to the platform.Please create an account.</p><button>Sign up!</button>
결과
- 아이디 패스워드 파일선택 버튼
<h1>Welcome!</h1>
<p>You have been granted acess to the platform. Please create an account.</p><input type="text" placeholder="Enter username" /><input type="password" placeholder="Enter password" /><input type="file" /><button>Sign up!</button>
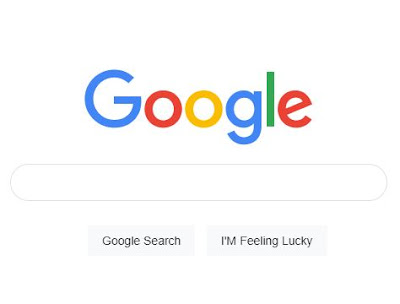
<h1>My work</h1><h2>Project 1: Google.com</h2><p>I built this one as a part of HTML&CSS</p><p>Check out the live demo<a href="https://google.com/" target="_blank">here </a></p>
<!doctype html><html><head><style>body,html {margin: 0;padding: 0;}img {width: 30%;display: block;margin: 100px auto 20px;min-width: 272px;}input {box-sizing: border-box;display: block;border-radius: 24px;border: 1px solid rgb(223, 225, 229);height: 44px;margin: 0 auto 29px;max-width: 564px;width: 90%;padding-left: 30px;font-size: 16px;}button {box-sizing: border-box;margin-top: 0;padding: 0 16px;font-size: 14px;height: 36px;background-color: #f8f9fa;border: 1px solid #f8f9fa;cursor: pointer;}button:first-of-type {margin-right: 8px;margin-left: calc(50% - 131.5px);}button::hover {}p {margin-top: 40px;text-align: center;}a {}</style></head><body><imgsrc="https://www.google.co.kr/images/branding/googlelogo/1x/googlelogo_color_272x92dp.png"width="100%"/><input width="100%" type="text" /><button>Google Search</button><button>I'M Feeling Lucky</button></body></html>
- 리스트 목록 나열하기
<!DOCTYPE html><html><head> </head><body><h1>Beijing Olympics</h1><ui><li>Norway</li><li>Germay</li><li>China</li><li>US</li></ui></body></html>
결과


